Lottie Pattern Hack 3 Tutorial
Welcome to the third Lottie Pattern hack tutorial! I hope you all are enjoying these posts and learning how easy it is to cut up and change the Lottie pattern to be anything you want it to be! It's a really wonderful blank canvas. For today's tutorial, we will be making a triangle mod colorblocked version.

For this hack, there is a colorblocked triangle on the front and back of the dress, that meet at a point at the center front and back, and at a point on the side seams as well. This might look like a lot of pattern alterations, but honestly, it's very very simple.

First, as with all these hacks, be sure to trace off your pattern before making any changes. Once you've done that, cross out the place on fold instructions on both the front and back pieces.
Next, we will make the markings for the seams on the front and back. To make it easy, I used the notch on the lower side of the pattern as my spot on the side seam for starting the colorblocking. For the point along the center line, measure up from the hem 24". We are going from the bottom up because it's easier to be consistent on both the front and back pieces if we don't involve the shoulders or darts.
After pinpointing the notch and the spot 24" up from the hem along the center, draw a line to connect the two, as pictured above.

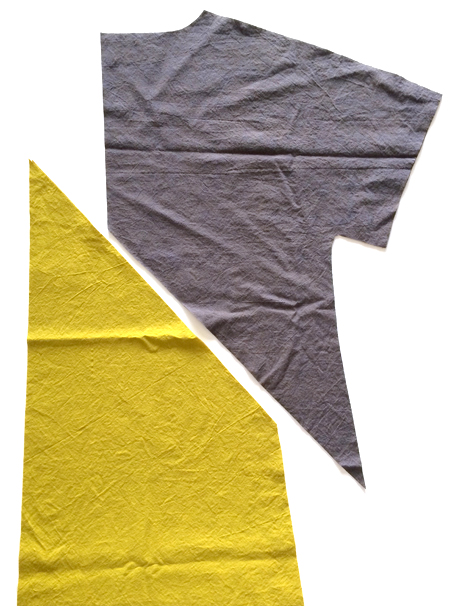
Cut along that line to create your upper and lower pieces for both the front and the back. Now that we have them separated, we need to add in some seam allowances.

Draw a line 5/8" from the cut line on all four pieces. Extend the pattern along the side and center seams for the new seam allowance. Easy!

And lastly, since we're not going to be cutting on the fold, we need to add in seam allowance at the center front and center back. Again, simply add 5/8" along that edge on all four pieces and extend the pattern into the seam allowance. Take a moment to label all the pieces now as to which piece goes where, and that you need to cut two of each piece.
Cut all your pieces out. You can add on the 3/4-sleeve extension if you like, or you can do this hack on the sleeveless version too. This hack will also work on the maxi length, but the shirt is less idea as it's not quite long enough to get the full effect.
Before moving onto the colorblocked seams, first take a moment to staystitch the necklines, as well as to sew the bust darts. The rest should remain unsewn.
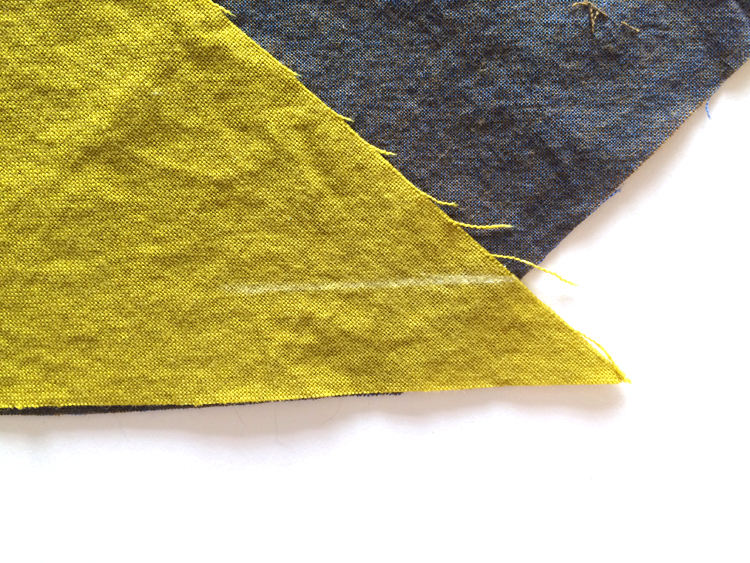
Place the lower and upper pieces together, right sides facing. Since we didn't true up the ends of the seams, they won't actually match up because of the angle of the cut. But not to worry, there's an easy fix! Simply draw a line at the 5/8" seam allowance mark near the spot where the pattern pieces intersect at the side and center seams. As you see in the above photo, the mark on the yellow fabric is where the stitch will be, so that's what we want to line up with the other fabric.

Pin in place and stitch at the 5/8" seam allowance. Repeat this on all four sections so you have two front pieces and two back pieces.

From here, now that you have the two front sections sewn and the two back sections sewn, you can simply sew the pieces together at the center front and center back, then continue on with the rest of the pattern as instructed. However, if like me you're coo coo for topstitching, you can follow along with the rest of the tutorial to see how I did mine.
I decided that I not only wanted to topstitch the seams, but that I also was going to take that opportunity to fold the seam allowances under on the inside, so it would also be nice and clean. As pictured above, all you need to do is fold the 5/8" seam allowance in half and press in place. Note: this is the inside of the garment. Repeat on all four pieces.

To topstitch the seams, stitch 1/4" from the seam. You can use contrasting thread, or you can choose to match your thread to the fabric as I did above. Note: typically the needle thread is a little smoother of a stitch than the bobbin thread, so if your machine is like this (as mine is), do all your topstitching from the right side. Just be sure to catch your folded seam allowance on the inside. Repeat the topstitching on all four pieces.

Your pieces will now all look like the image above, with the folded seam allowance on the inside (left) and the topstitched seam on the outside (right). You can see how much nicer my needle thread is on the right compared to my bobbin thread on the left. If you've had issues with your topstitching looking awesome, compare yours on a scrap to see if this is true for you as well!

Pin the two front pieces together along the center front and stitch. If you are feeling uneasy about the colorblocked intersection, baste it in place before sewing to make sure it's lined up perfectly. Repeat by sewing the two back pieces together along the center back seam.

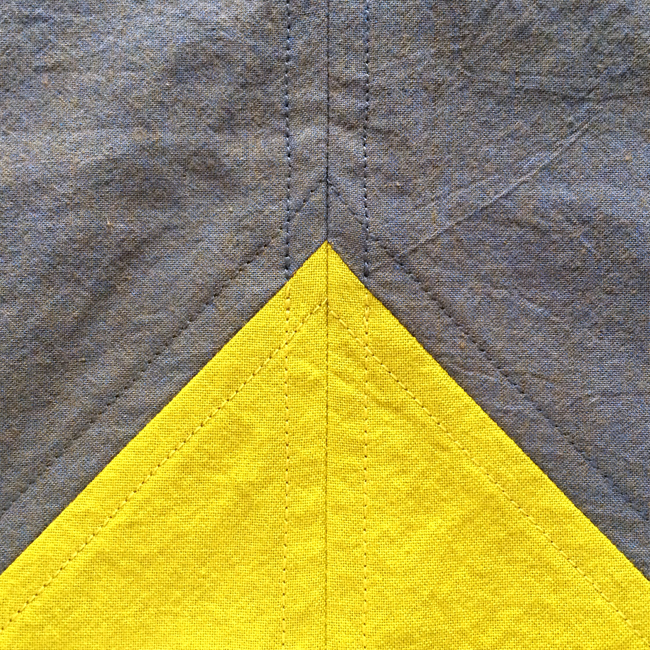
Your front and back pieces will now look like the image above. Again, you can simply leave it as is, or if you want to topstitch the center seam like you did the triangle seam, repeat the previous steps to fold and press the seam allowance in half, then top stitch down the seam.
I chose to keep my threads consistent as previously sewn and stitched the upper portion with gray thread and the lower with yellow thread. To do this, simply stop and backstitch right where they meet, change thread color, then backstitch with the new color and carry on sewing to the hem so it looks like one continuous stitch.

Now that the front and back pieces are completely joined and top stitched, you can carry on with the rest of the dress as instructed. At the side seams, be careful to join the colorblocking where the seams meet. Because of the underarm curve, finish the side seams as you usually do without topstitching.

And voila! You're done! Remember, if all the seam allowance folding and topstitching is too confusing or too much pressure, you don't have to do any of that part if you don't want to. You can simply cut the pieces and join them along the angled seams, then join them at the center front and back, and carry on as instructed in the instruction booklet. It's entirely up to you!
Remember to use the hashtag #lottiepattern (not #lottiedress - there's a whole mess of other stuff in there) and/or the #christinehaynespatterns hashtag so we can all see your awesome makes!