
Emery Dress Sewalong: Alternate Neckline Finishes, Part 1
In today’s Emery Dress Sewalong post, we are going to learn the first of two alternate methods for finishing the Emery Dress neckline. The pattern calls for a bodice lining, but sometimes you want to only use a facing or bias binding, so those are the methods I am going to show you. In today’s post, I am going to cover all the steps to create and sew a facing in place of the lining. It’s super duper easy! Here we go!
HOW TO FINISH THE EMERY DRESS NECKLINE WITH A FACING
Create Back Facing
For this example I am creating a 2” wide facing. Once sewn into the neckline, that will reduce it by 5/8”. If you would prefer a narrower facing, simply use the amount you’d like in place of my 2” measurement.
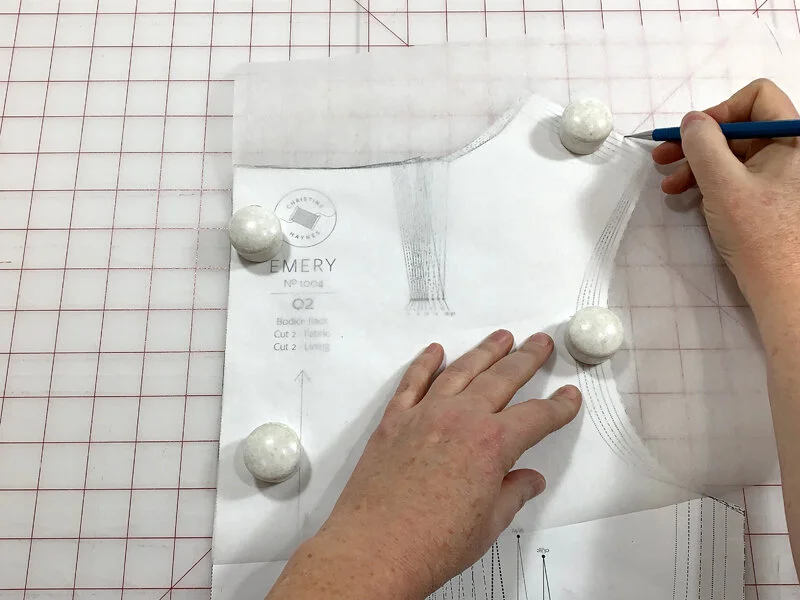
Start by tracing off the neckline and at least 2” of the shoulder and center back on the bodice back piece. Also mark the dart on the back neckline. I’m using Swedish tracing paper, which I highly recommend.

Measure over 2” on the shoulder and make a mark. Repeat this on the center back seam.

Following the neckline, measure down 2” along the entire neckline. Skip the spot near the dart.

Fold the dart as if it were sewn and tape in place.

Connect all the marks to create a facing that is 2” wide, or the width that you are choosing to use.

Label the piece, transfer the grainline from the original piece to your facing, and cut it out. It’s ready to go!
Create Front Facing

Like on the bodice back, use tracing paper to trace off the neckline and at least 2” (or the measurement you’re using for your facing) of the shoulder and center front seams.

Since there are no darts in the front bodice neckline, you can simply measure down the width of your facing, and connect all the lines to form the facing.

Mark the facing with all the information you will want later, like the pattern name, shoulder and center front, as well as the instruction to place the center front on the fold.
Sew the Facing

The dress should be sewn up through the zipper insertion: the bodice is sewn, the skirt is sewn, the two are attached, and the center back is closed up with the zipper.

Cut the front facing on the fold in both fabric and interfacing. Press the interfacing to the wrong side of the front facing piece.

Cut two back facing pieces in both fabric and interfacing. Press the interfacing pieces to the wrong side of the back facing pieces.

Sew the facing front to the facing back pieces at the shoulders. Press the seam allowances open and trim in half to reduce bulk at the shoulders. Note that since the shoulders will be exposed, you might want to finish the seam allowances of both the bodice and facing shoulder seams at this point.

Finish the outer edge of the facing with the stitch of your choosing, then place the facing on the neckline, right sides together, matching seams, center front, and center back.

Sew along the neckline with the 5/8” seam allowance.

Understitch the facing to the seam allowance along the neckline.

Grade the seam allowance and press the facing to the inside

At the center back, simply fold in the ends of the facing, pin, and press.

Pin the facing to the garment. To secure the facing, either hand tack to the shoulder seams and center back, or topstitch the in place as pictured above.
Since the inside of the bodice is unlined, you should consider finishing the side seams of the bodice as well as along the waist seam.
From here, carry on with the rest of the instructions for the sleeves and hems. That’s it!