Emery Dress Sewalong: Sleeves, Hems, & Optional Bow
We are at the final post for the Emery Dress Sewalong! If you’ve made it this far and are still sewing with me, congratulations, you are nearly done! All that is left to do are the sleeves, hems, and the bow if you are choosing to add that detail. This post is a big one with a ton of photos, so let’s get right to it!
SLEEVES
Prepare The Sleeves
Before we can attach our sleeves, we need to get them ready. In order to set the sleeves we need to sew some baste stitches along the top of the sleeve cap. I prefer to do this while the sleeve is still flat, but you can do it after sewing the side seam as well.

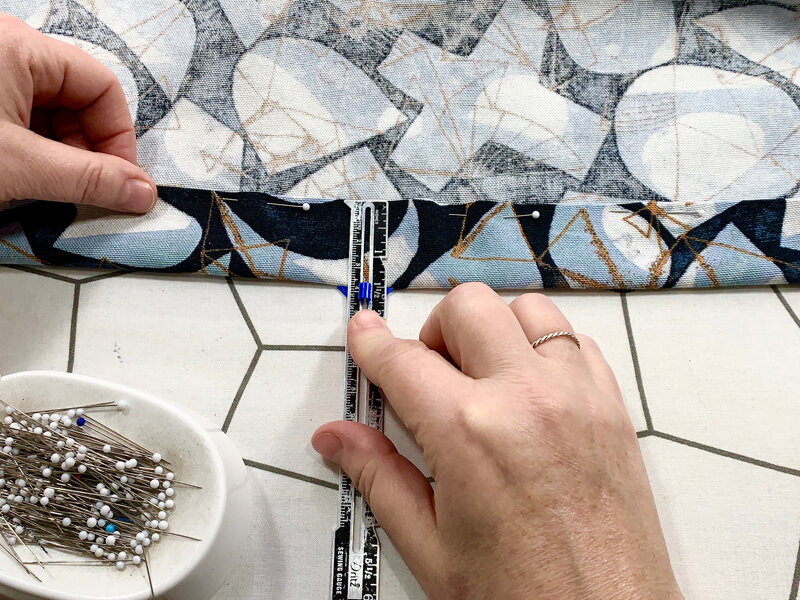
To see the notches clearly during the sewing process, I like to mark the single and double notches, as well as the upper cap notch with a water soluble marking tool.

With your stitch set to a long length of 4.0-5.0, sew two rows of stitching at the 3/8” and 3/4” seam allowances. Do not backstitch and leave long thread tails to pull on later.

Fold each sleeve in half, right sides together, and sew the short side seam. Make sure you have a mirror set of sleeves. It’s very easy to accidentally sew them incorrectly if you do not have a clear right and wrong side to your fabric.
Press the seam allowance open and finish as desired. Repeat on the other sleeve.

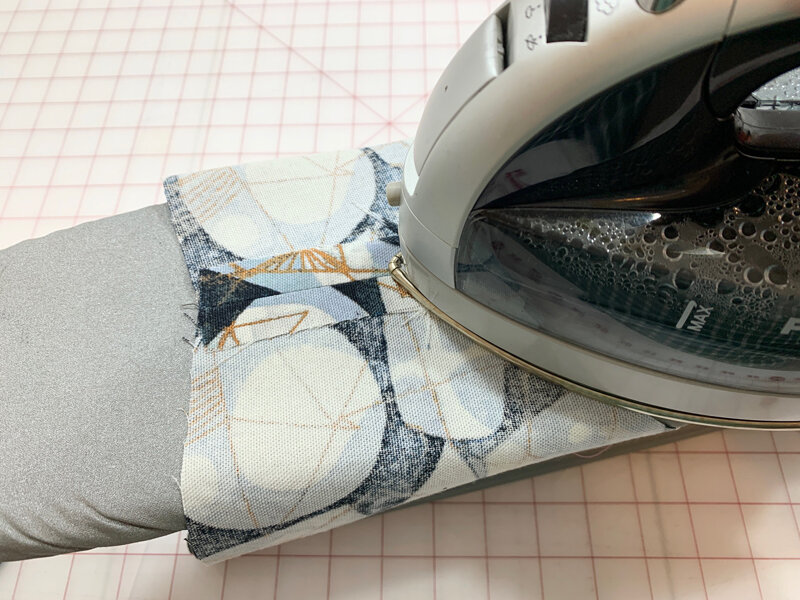
If you know that the length of your sleeve does not require any altering, I find it is easier to hem the sleeve before sewing it into the garment. You can absolutely do it later though if you aren’t ready to commit to a sleeve length. For either View A or View B, the sleeve hemming steps are the same. First press the hem up, wrong sides together, 1/2” and press. Fold and press another 1/2”

Topstitch the sleeve hem by sewing close to the upper edge of the fold. Press again when finished and repeat on the other sleeve for a matching set.
Set The Sleeve

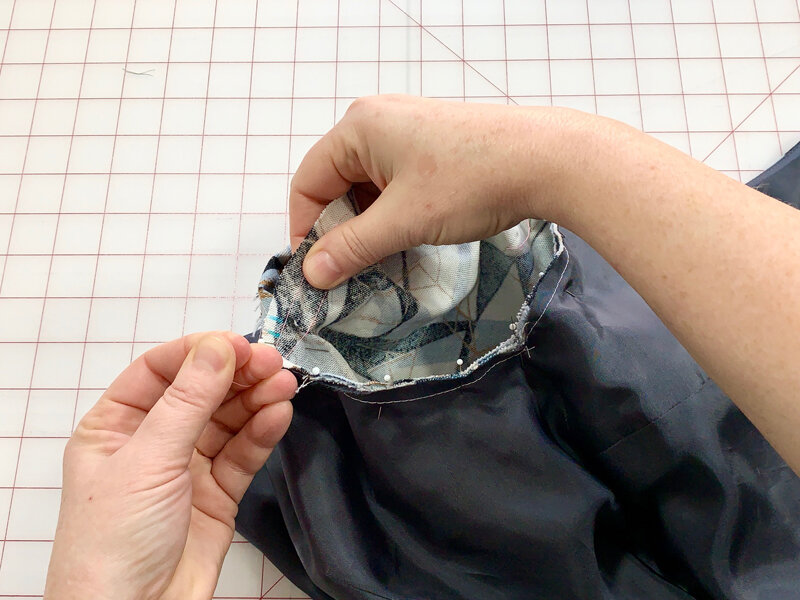
Before inserting the sleeve, it can be very helpful to baste the bodice outer and the bodice lining together around the opening where the sleeve is going to go in. If you choose to do this, be sure to stay inside the 5/8” seam allowance.

With right sides together, insert one sleeve into the matching opening. The way to make sure it’s correct is the double and single notches should match. Double notches equals back, and single notch equals front, so make sure they line up and you are putting the correct sleeve into the correct opening.

Line up the double notch, the single notch, the upper sleeve cap notch, and the side seams and pin in place at those four anchor points.

Pin the sleeve area that does not require any easing, from the side seam to the single notch, and from the side seam to the double notch.

Pull on the baste stitching to gently gather the area of the sleeve cap that requires easing.

Gather until the cap is gathered enough to fit into the area between the upper notch and the single notch. The gathers do not need to be smooth at this point.

Wrap the baste threads around the pin at the notch and secure with a figure eight.
Repeat the gathering on the other side of the sleeve cap, from the double notch to the upper notch.

Secure in the same manner, locking the threads in place on the pin with a figure eight.

Even out the gathers so the seam line is smooth and pin in place. The upper edge of the sleeve will not be smooth, so do not worry about that. Focus on the area between the baste stitches where you will be sewing. That’s the area we want to be smooth so you do not form any tucks or puckers while sewing.

Repeat on the other portion of the sleeve cap, so the entire cap is pinned.

Starting at the side seam, sew the sleeve in place.

When you approach the first pin holding the baste threads, stop, sink your needle, remove the pin, and separate the threads as to not sew over them.
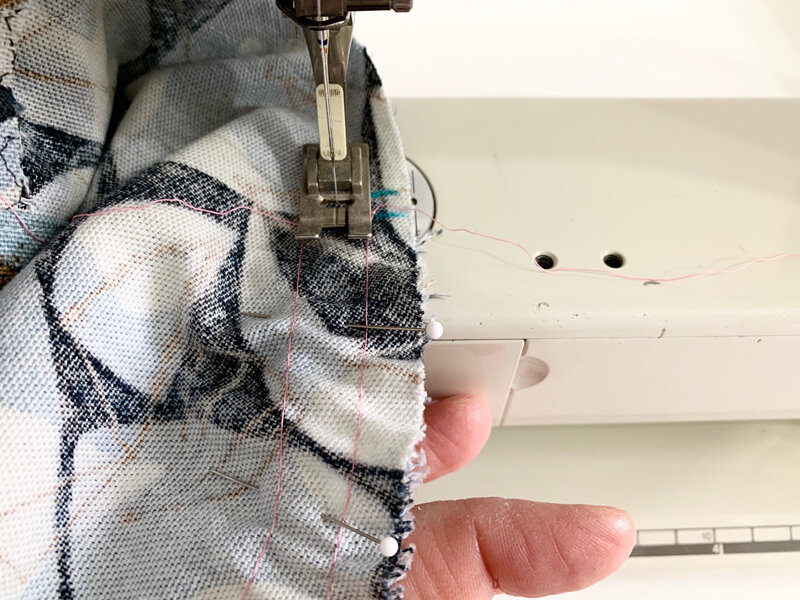
Continue sewing, being careful to not form any pinches or tucks. Stop, sink your needle, and adjust the fabric as much as necessary to keep the sleeve cap smooth.

Once sewn, you will have something like the image above! Sleeve sewn into the dress, with no puckers in the seam. Carefully remove the baste stitches from the sleeve cap.

Trim the seam allowance in half to reduce bulk and to allow the curve of the sleeve to open fully.

Finish the seam allowance with the stitch of your choosing. If using a serger, you can trim and finish all at once.

Press the seam allowance of the sleeve toward the sleeve. Slip a pressing ham into the shoulder to take the place of the shoulder to help you press smoothly.

And you now have one sleeve in! Repeat all the above steps to set the other sleeve.
DRESS HEM
Press The Hem
The dress hem has a generous 2” hem allowance. Try on the finished dress and confirm that this is the amount you wish to use for your desired length and adjust as needed.

Fold and press the dress hem 1/2” wrong sides together.
Fold the dress hem a second time, 1 1/2” and pin in place. Because the skirt hem is designed to be hand sewn, there will be some fullness in the hem, so it is much easier to pin it first, then press it after.

Press a crisp fold in the hem of the dress. When pressing on top of your pins, make sure to only use glass or metal heads on your pins, as plastic heads will melt under the heat of the iron.
Sew The Hem

Carefully hand sew the hem in place. You can choose to topstitch the hem with your machine if you prefer visible stitching.
OPTIONAL BOW
Create The Bow
If you do not want to include the bow, you’re done! But I know many of you love this little 1960’s inspired bow as much as I do. So if you want that little detail, here’s how to construct it!

Center the bow interfacing piece onto the wrong side of the bow piece and press in place.

Fold the bow in half, right sides together, and secure with pins. Using a water soluble marking tool, mark the two spots to indicate where to leave the bow open at the center.

Stitch the short end, pivot at the corner, and stitch until you reach the first mark on the long end. Repeat on the other side of the bow.

Trim the seam allowance way back on the section sewn only. Do not trim the area where you left it open in the middle. I find it’s MUCH easier to get a clean and even fold if you have the full 5/8” seam allowance to fold in, rather than a tiny trimmed amount.

Carefully turn the bow right side out.

Slip a point turner into the bow and gently poke out the corners on each end.

Fold the seam allowance at the open area so it is in line with the sewn seams on either side.

Press the bow flat.

Topstitch all four sides of the bow, which will also close up the opening at the same time. I like to start and stop my stitching in the center, as the bow center piece will hide any messy backstitching!

Fold the bow in half, and using your pattern piece as your guide, mark the stitch line on the bow. Sew along that line, through both layers of the bow.

You now have a loop on the left side of the stitch line, and two ends on the right of the stitch line. To form the bow, separate the two ends, and center the stitch line on the loop. Once the center is secured with the bow center, the loop will be the two ends of the front of the bow.
Create The Bow Center

To form the bow center, fold the piece in half, right sides together, and sew along the side with the notches.

Trim the seam allowance to reduce bulk.

Finger press the seam allowance open, then turn the piece right side out.

Center the seam and press the bow center piece flat. Topstitch on either side of the long edge to match the bow topstitching.
Assemble The Bow

To assemble the bow, start by folding one short end of the bow center about 1/2” toward the back side. Place the front of the bow on top of the back side of the bow center (top left image). Wrap the unfolded end of the bow center around the bow and secure with a pin (top right image). Bring the folded end of the bow center up and pull until the desired amount of cinch is created on the center of the bow. Secure the end with a pin and remove the pin placed in the last step (bottom left image). Hand sew the bow center in place along the fold on the back of the bow, turn over, and it’s done!
Attach The Bow

Place the bow on the dress front, centered on the bodice, just above the waist seam and pin in place. Secure to the dress by simply hand sewing through the layers of the dress to the underside of the bow to tack it in place. And that’s it!
Thank you so much for joining me for the Emery Dress Sewalong! I hope you found it helpful to watch me do each and every step, as well as many pattern alterations so you can achieve a perfect custom fit!
Remember to share your finished makes with the hashtag for the pattern: #christinehaynesemery as well as for the group hashtag: #christinehaynespatterns. I can’t wait to see what you make!