Lottie Sewalong: Lengthing, Shortening, & Blending Sizes
Originally posted on June 15, 2016, enjoy this post from the original Lottie Sewalong on how to lengthen, shorten, or blend between sizes on your Lottie Dress, Top, or Tunic! Please note that when this was written, the pattern was printed on tissue, with alternate view options and our old logo. The steps remain the same, so just follow along with your new pattern pieces!
In today's post for the Lottie Sewalong, we will get into our first post with pattern alterations. I will guide you today through the steps for lengthening or shortening the length of your Lottie, and how to blend between sizes too. Being only 5'4" I usually have to shorten every pattern I make, and I also almost always need to blend sizes too, as my shoulders are much smaller than my hips on the average body size chart. No worries though, these are very straightforward and easy changes to make, and I will talk you through them for your own pattern.
Note: I recommend making pattern alterations to a traced off pattern rather than your original, as you will likely want to keep that in tact for future sewing.
Lengthening the Lottie
If after taking your body measurements you find that you'd prefer your Lottie to land at a slightly longer spot than the hem calls for, this is how you can make the simple alteration.

Step 1: Each view of the pattern has a Lengthen or Shorten line. All three views are nested together and each line is labeled with top, tunic, or dress. Be sure to use the one that corresponds with the length you are sewing.

Step 2: On a piece of paper, draw a vertical line to use as a guide for the grainline. In this instance, that will be to use to line up with the "place on fold" edge of the pattern piece, which serves as the grainline.

Step 3: Draw two more lines, perpendicular to the first line. The distance between the two lines should be the amount you want to lengthen the pattern.
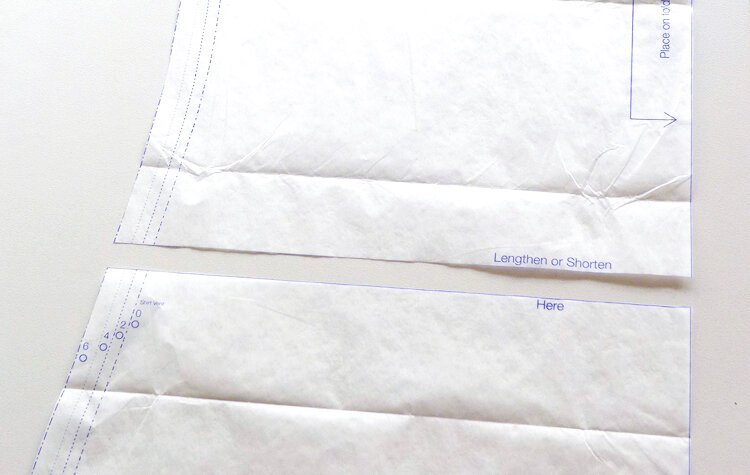
Step 4: On the pattern piece, or your traced off version, cut along the Lengthen or Shorten line.

Step 5: Place the top piece flush with the top line and squared up with the right line. Repeat by placing the bottom piece so it is flush with the bottom line and squared up with the right line.

Step 6: Tape the pattern pieces in place along the lines.

Step 7: On the side seam, the edges will no longer line up perfectly since you have dropped the lower part down. All you need to do now is connect the two again. Use a ruler and mechanical pencil to make a smooth transition along the side.
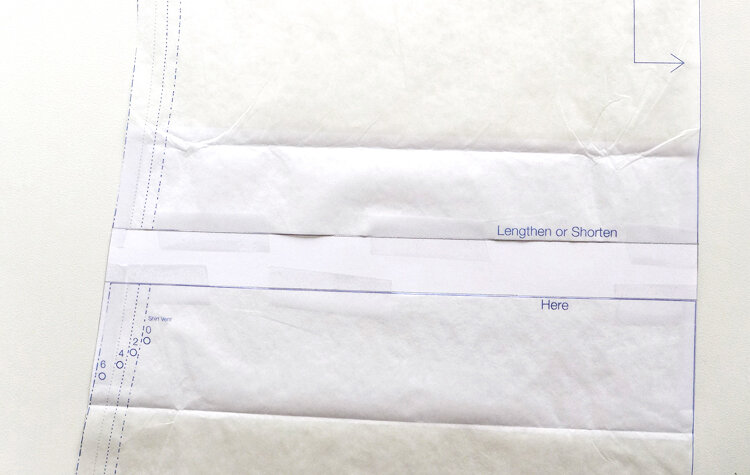
Step 8: Trim the paper away so you now have one pattern piece with the extension for the added length. And done! But of course, be sure to do the same to the corresponding front or back piece so they match.
Shortening Lottie

Step 1: Each view of the pattern has a Lengthen or Shorten line. All three views are nested together and each line is labeled with top, tunic, or dress. Be sure to use the one that corresponds with the length you are sewing.

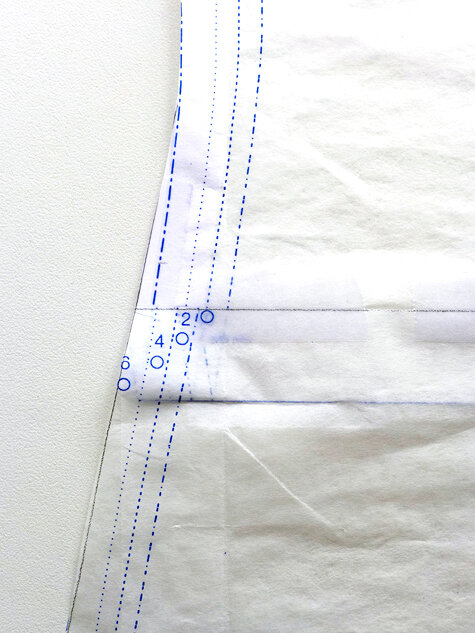
Step 2: After you have decided how much to shorten the Lottie by, split that amount and put half on either side of the Lengthen or Shorten line.

Step 3: Draw a line for each amount parallel with the line on the pattern.

Step 4: Lift the lower line to meet with the upper line and fold the pattern to reduce the length by the amount you drew on the pattern. Tape it in place.

Step 5: To straighten the side seam, you likely will need to tape some paper to fill the gap created by folding the pattern. Using a ruler and mechanical pencil, smooth the side seam with a new line.
Step 6: Trim away the extra paper and that's it! Be sure to repeat the same alteration on the corresponding front or back piece so they match.
Blending Sizes

Step 1: To blend between sizes, you want to make sure to create a smooth transition. Anything angled or too sharp will prevent the garment from hanging correctly and the shape will be distorted. If you have a curved ruler, this can be helpful.

Step 2: Once you've drawn your new line, simply trim the pattern to the new side seam line. Be sure to make the same change to the corresponding front or back piece so they match. And that's it!
Congratulations! You've made pattern alterations! In the next post we will learn how to make bust adjustments. See you then!