Lottie Sewalong: FBA, SBA, & Rotating Darts
Originally posted on June 17, 2016, enjoy this post from the original Lottie Sewalong on how to do a Full Bust Adjustment (FBA), Small Bust Adjustment (SBA), and rotate your darts on your Lottie Dress, Top, or Tunic! Please note that when this was written, the pattern was printed on tissue, with alternate view options and our old logo. The steps remain the same, so just follow along with your new pattern pieces!
Today on the Lottie Dress, Top, & Tunic Sewalong we are talking about bust adjustments. The honest truth is that rarely do darts fit perfectly right out of the envelope. Everyone's bust is different. Even if you are the same size as a friend, yours might be higher, hers might be lower, and the variance between your body size and your bust might be totally different. So even if everything else on the pattern fits perfectly, there's still a good chance that the bust darts will need to be smaller, bigger, or rotated to match the placement of your bust.
In today's tutorials, I will walk you through how to do a Full Bust Adjustment (FBA), a Small Bust Adjustment (SBA), and how to rotate your darts for the Lottie Pattern. All are very straightforward and are pretty much the same as other tutorials you've likely seen out there, but one key difference is that because the Lottie has a dolman sleeve, meaning that it's automatically attached to the shirt front, that part is a little unique.
A couple of pointers before we get started. First, if you plan to do any of these adjustments, I suggest tracing off your pattern first so that is untouched. Also, with every change, I suggest you make a muslin to test the fit. I would make a muslin to start, before even doing the adjustments to see what it tells you, then make another after you've made the adjustment. It's not a hard pattern so you really only need to sew up the shoulder and side seams to see what's up. No need to hem or add pockets etc. Okay, so let's get started!
Rotating the Darts
I almost always have to do this adjustment on every pattern I make. I wear a fully supportive underwire bra, but still, they're not as high as they once were, so tipping my darts down a little is common for me. You might have the opposite issue and need to raise them a bit! Either way, here's how I do it.
1. My suggestion on how to find out if you need to rotate the darts is by looking at your muslin. Try on your muslin and see where the fullest point of your bust hits in relation to the end of the bust dart, the apex. The apex of the bust dart should be about 3/4" away from the fullest point of your bust.
2. Mark where you want the apex of the dart to be, then take off the muslin.
3. Transfer this marking to your pattern piece.

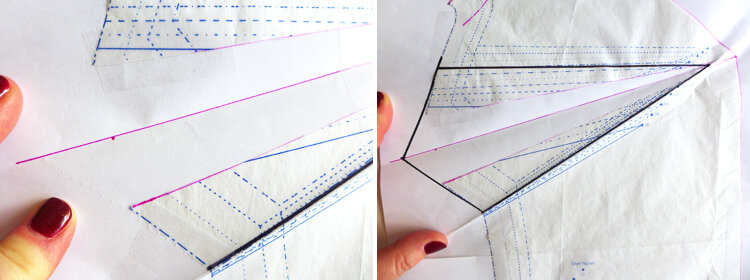
4. Draw new dart legs, starting at the side seam where your original bust dart started, ending at your new apex.

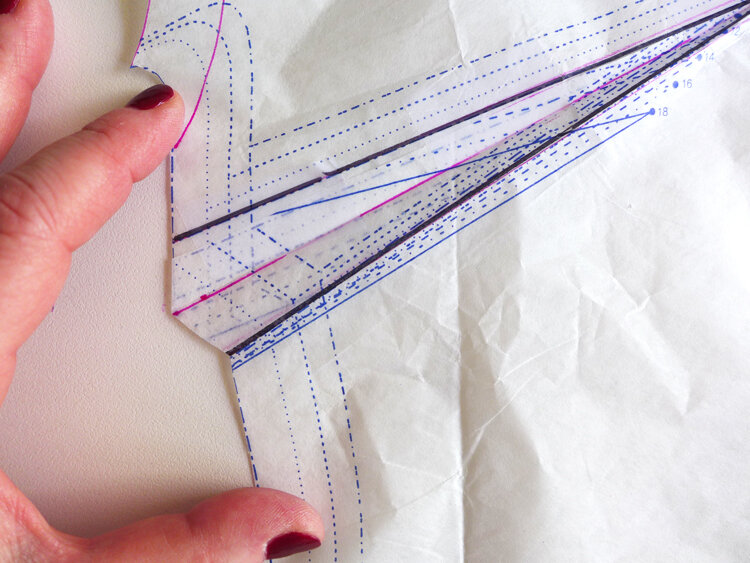
5. Fold the bust dart to look like it will be once it is sewn. The legs should be directly lined up and the excess paper should be folded down, just like the fabric will be. Carefully trim the side seam to be flush, as likely the excess fabric in the fold will jet out past the side seam with this adjustment. If you find that it now doesn't reach the side seam, tape paper to the side seam so you can extend it to be flush.
6. Unfold and make yourself a new muslin to test the fit! That's it!
Full Bust Adjustment
If after you take your bust and your upper bust measurements you discover that your full bust is 2" or more larger than your upper bust, you will likely want to try a FBA on your Lottie. Now, this is a loose and slightly oversized pattern, so there is room for interpretation here, and you might be perfectly happy with how it fits, despite having these kinds of numbers. That's fine. But if you have fit issues, like drag lines under the bust to the side seam, or if you have gaping above your bust, these are ways to fix that.
The most common mistake is thinking about your bust adjustment in relation to your bra. But your bra measurement is the band that is under your bra, and we're working with your full bust measurement and your upper bust measurement, above your bust. The Lottie hangs free after the bust, so we aren't taking your under bust measurement into consideration, so that's why the numbers won't likely match your bra size.
You will be using one size for the entire pattern, based on your body measurements and your high bust, not your full bust. Then you will adjust the bust to fit. Ready? Okay, here we go!
1. Write down your full bust and your upper bust measurements. The difference between them is the amount we are going to add to the bust. However, since we are working with only half of the pattern, we only need to add half of that amount. So let's say for example you have a 3" difference, you need to add 1 1/2" to each bust dart, for 3" total added.
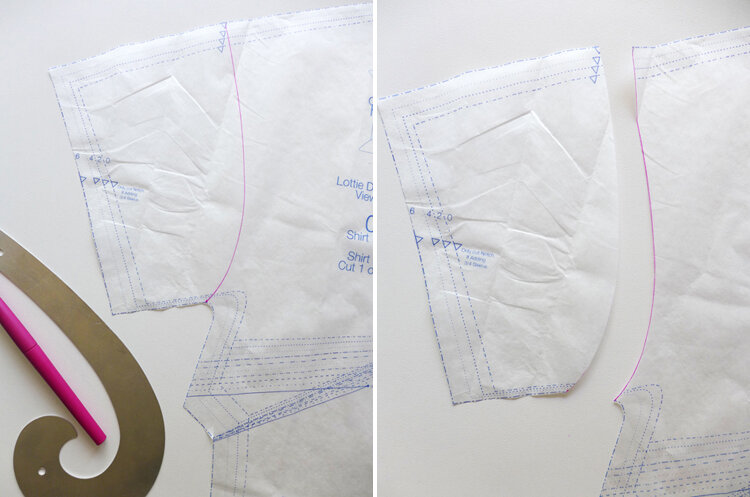
2. As mentioned above, the unique element of the Lottie in relation to bust adjustments is that it has a dolman sleeve. Not to worry! Starting on the shoulder seam, use a French curve to draw a faux armscye to right where the curve begins under the arm. Carefully trim the sleeve off and set aside. We need it out of the way to make our adjustments to the bust. But we will need it again later to reattach.

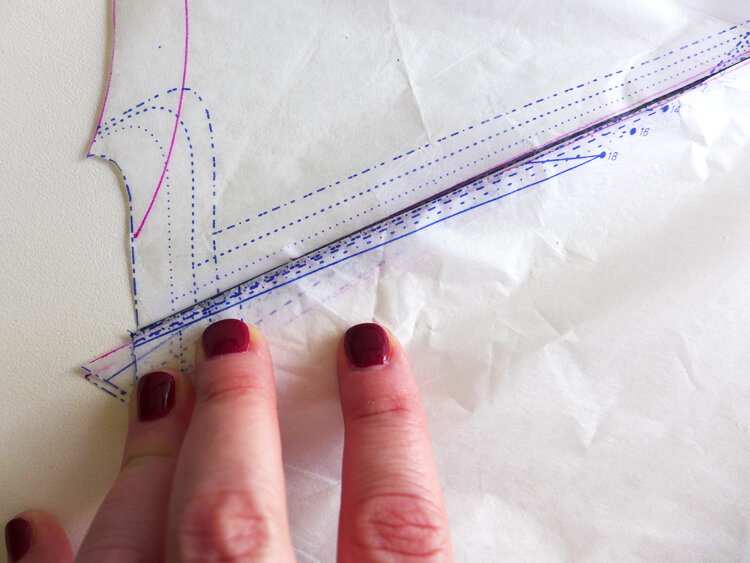
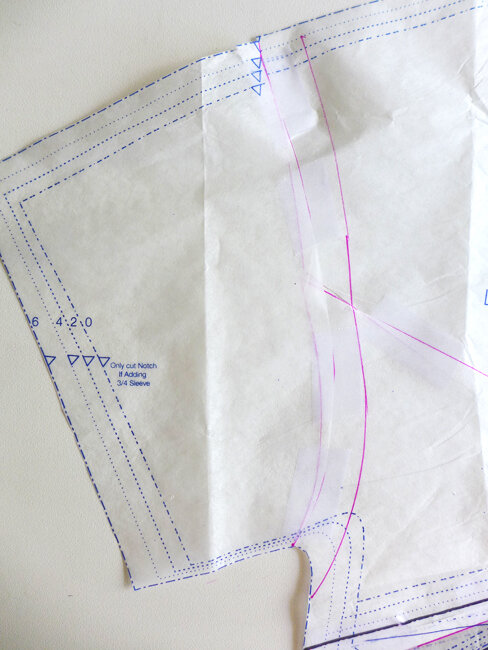
3. Usually you start your markings for the bust adjustment using the notches on the armscye. Since we don't have those due to our dolman sleeve, find the midway point and mark it with a dot. Just like above with rotating the darts, mark your bust apex on the pattern with a dot. Now we are going to draw four lines. First, draw a line from the bust apex to the dot on the armscye. Second, draw a line parallel with the "place on fold" line, from the bust apex all the way to the hem. Third, draw a line from the bust apex to the center of the bust dart. Fourth, the last line to draw is your seam allowance on the armscye. Now we don't really have a seam allowance here, since the whole sleeve will reattach, but we need a pivot point, so draw in a 5/8" seam allowance along that curve to use for this purpose.
Cut along the line going down the front to the apex, then keep cutting along the line to the new seam allowance mark at the armscye. Cut along the line going through the bust dart, stopping just before the end so it remains connected. And lastly cut along the little line in the armscye seam allowance, again stopping just before the end so it acts like a hinge.

4. Measure the amount you need to add into the pattern, (remember, it's half the total) and separate the center line by this amount.

5. Tape the pattern down on some white paper, keeping this measurement consistent along the opening. The hinges at the apex and armscye will pivot accordingly.

6. Back away from the apex about 3/4" and that is your new apex. Draw lines from this new apex to the side seams to create your new dart legs.

7. Fold the bust dart as it will be when sewn. The legs should be on top of each other and the excess paper should be pressed down like the fabric will be once it is sewn.
8. Use a patternmaking wheel to perforate the paper by rolling it along the new side seam. Once unfolded, you will see the little dots. Draw those into place and trim to these lines.

9. To reattach the sleeve, line up the pattern at the bottom of the armscye and at the shoulder, so the pattern paper lines up along the drawn edge. The top will no longer match, but what's important is that the distance between the hem of the sleeve and the neck opening remain as it originally was. Tape this down in place, adding paper underneath the armscye area and at the shoulder seam.

10. Use a ruler and level the shoulder seam by blending the area around the armscye. A little bit of the original sleeve will be trimmed off. This is okay!

11. Here's how yours should now look! Extra room added in the bust, but the shoulder and sleeve and underarm areas remain as they were at the start. There is a little bit added in at the curve of the armscye area, but it is minor and doesn't effect the fit.

12. Lastly, you will need to adjust the length of the right side to match the left side. If it is only an inch or two, as pictured above, you can simply redraw the hem and "place on fold" lines in. Alternatively, you could trim the right side at the "lengthen or shorten here" line, and drop the right side until the hems match, then redraw in the "place on fold" line accordingly.
Small Bust Adjustment
Just like with the FBA above, you will be using one size for your entire pattern, but then reducing the bust to fit. If you have gaping at the bust, or if you find that your upper bust and full bust are nearly the same, you will want to do a SBA.
Again, you will only want to add half your total reduction to each bust dart, so if you need to reduce you 1" total, then you are reducing each side by 1/2". Okay let's do it!
1. Repeat steps 2 & 3 from the FBA tutorial above to mark your pattern, your armscye, and cut accordingly.

2. Instead of opening up at the center, we are overlapping at the center by the amount we need to reduce by. Overlap along the center cut and tape in place.

3. Using your custom apex, measure back about 3/4" and this is your new apex. Draw new dart legs from that point to the side seams, lining up with your pattern size's dart markings along the side seam.
4. Fold the bust dart as it will be when sewn. Line up the legs on top of each other and press the folded excess paper down, like it will be when it is fabric.
5. Trim along the side seam to smooth and open for your new bust dart.
6. Just like in the FBA, line up the bottom and top of the sleeve, making sure those points line up. You will lose a little fabric at the armscye, but it will not effect the fit. Tape together, and trim the top to smooth.
7. Adjust the length the same as in the FBA. If you need to shorten it, the only difference is you will be raising the left side instead of lowering the right. Easy peasy!
Congratulations!!! You did it! See, it's not too scary to do bust adjustments. Now before you do anything, make a new muslin with these changes to confirm the fit. You just changed a lot of stuff, so before you cut into your precious fabric, make sure you are happy. We will meet up next to discuss cutting, where to line up stripes, and all your markings and notches. See you then!