Lottie Sewalong: Cutting & Marking
Today in the Lottie Sewalong, we're finally getting to the real deal! This is the start of our finished version, and we will begin cutting and transferring markings from the pattern to our final fabric. This is an easy but important day, so be sure to take your time with this step. My students often ask me how to get professional looking garments, and I would always remind them that it all begins in the cutting, as poorly cut fabric will not magically become beautiful seams. Once it's cut, it's cut. So don't rush it and enjoy the process!

Cutting
You will find in the layout portion of the pattern instructions a series of guides, based on the fabric's width and your chosen size. For the Lottie Pattern, the Dress, Top, & Tunic Front and Back pieces are placed on the fold, so there isn't a lot of variation in the cutting from chart to chart, but there are some key things to consider during this process. Some of my cutting tips are below:
Before cutting, always pre-treat your fabric in the manner best suited for the fabric, and in relation to how you want to care for it afterwards. If you are in question as to the care and content of your chosen fabric, contact the store that you purchased it from.
After pre-treating the fabric, press the fabric with an iron set to match your fabric type. Be sure to keep your iron movements going with the grain of the fabric, and not on the bias, as you might stretch and warp the threads.
Because of pre-treating, you will need to refold the center fold that was lost in the washing process. Remember that your cut ends will likely not line up anymore. What's key is that the threads woven from selvage to selvage are straight, or your fabric will be off-grain from the start. Hold your fabric up and check to see it's hanging straight, when folded in half. Then you know it's on grain.
When the pattern piece is to be placed on the fold, always pin that side first, making sure it is placed directly on the fold and not hanging over. If you see extra fabric, you're actually adding double that to the center front or center back, because of the fold. And same goes if you hang the pattern piece over, you are reducing the pattern by double that amount. So try to get it on the money.
For the pieces not placed on the fold of the fabric, always be sure to use a 12-14" ruler to put the "grainline" of the pattern on-grain, so it is perfectly parallel with the selvage edge. If the pattern piece is to be cut on the bias, the same rule applies. The "grainline" written on the pattern piece should be parallel to the selvage, but the pattern piece itself will be angled at 45-degrees so it is cut on the bias of the fabric.
Cutting can be done with pattern weights and a rotary cutter, or pins and scissors. The bust dart and underarm curve are really hard to do accurately with a 45mm rotary cutter, so I would suggest at a minimum cutting those areas with your scissors.
And remember, the three views: A, B, & C are merely suggestions. Mix and match all the elements however you like to create your own custom Lottie!

If you plan to use a stripe, plaid, or gingham print, the ideal spot to line up the print is at the hem, working your way up from that starting point. The reason is that if you start at the underarm seam, the bust dart will alter that area, and everything from that point down will be off. So instead, match everything up to the bust dart, and only that area will be off.
In addition, if you are planing to use a stripe, plaid, or gingham print, I highly suggest cutting in one layer, instead of on the fold. To do this, simply place the pattern piece on the fabric unfolded and pin in place. Use a marking tool to outline the pattern piece very carefully, making a mark where the center fold will be, without actually marking that entire line. Unpin the pattern piece, flip it over, line it up, and pin it in place. Cut it out and continue cutting the area you traced for a complete pattern piece. Easy and so worth it when your side seams line up!

In addition to your fabrics, remember to also take a moment to cut out interfacing for the Facing Front and the Facing Back pieces for the neckline. I like to use a lightweight woven fusible interfacing, like Pellon SF101.

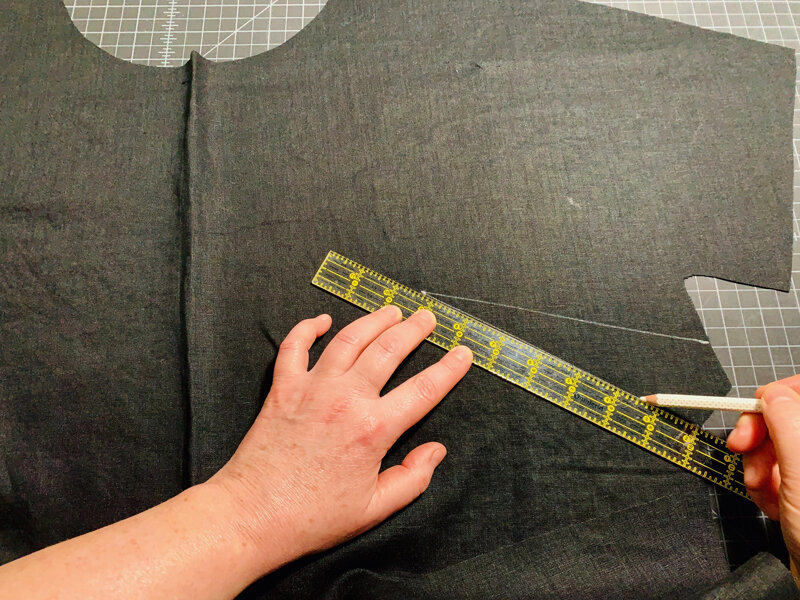
Lastly, if you don’t have enough fabric to cut both the Lottie Front and Back pieces on the fold, you can absolutely cut one or both of those pieces not on the fold, and then put a seam up the center front and/or center back. I am adding a center back seam to my Lottie Top, as I want to use this black linen from my stash and didn’t have quite enough length on the fold. But in an effort to use what I have, I am totally fine with having a center back seam. It will not take away from the garment for me at all.
To do this, you will need to add seam allowance to the edge that was to be on the fold, since you are now going to sew along that edge. Simply use a ruler and a marking tool to draw a line next to the “place on fold” side. The distance from the line and the pattern piece should be equal to the seam allowance you are going to use for that seam. For mine pictured below, I made my line 5/8” from the edge, so I can sew it at a standard 5/8” seam allowance.

Markings
Once you've cut everything out, it's time to transfer the markings from the pattern pieces to the cut pieces of fabric. All those marks are there to tell us something, so we need all that information once we remove the pattern piece so we can properly sew and line up all the pieces.
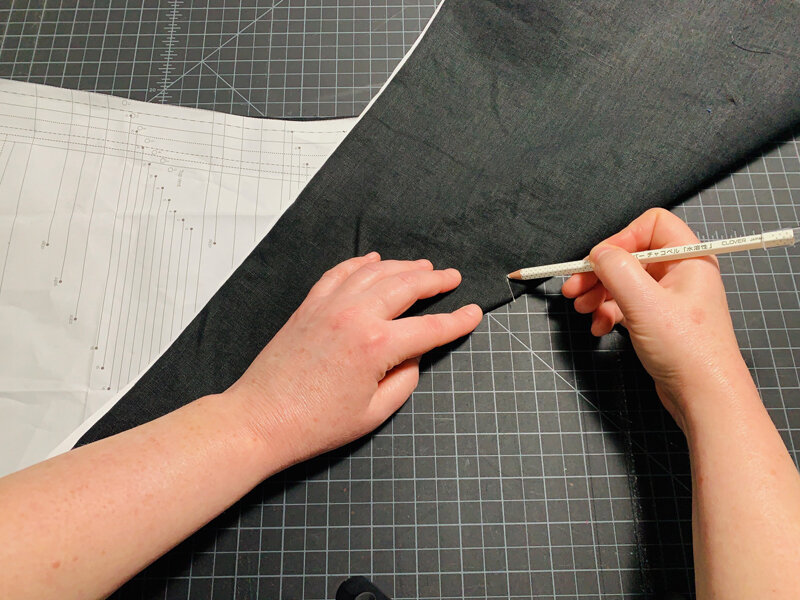
Some markings should be actually marked by using a water soluble marking tool, and some should be clipped with your scissors. Below are my suggestions on each mark and how I treat them.
Mark with Marker:
Pocket placement on the right side of the dress or shirt.
The stopping point on the side seam for the vent on the shirt or maxi length. This should be marked on the wrong side of the fabric, since right sides will the facing each other during the sewing process.
Bust darts on the wrong side of the dress or shirt front.
If I have a fabric that the "right" and "wrong" side are hard to discern, I place a small X on the wrong side of the fabric, within the seam allowance of each piece.
Cut with Scissors:
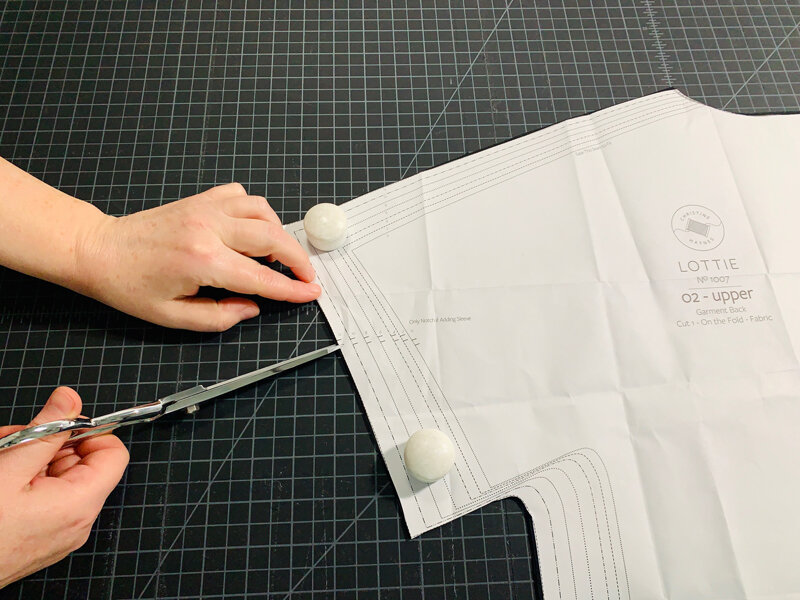
All notches on every piece. (Note that you will only cut the notches at the short sleeve hem if you are adding the long and 3/4-length sleeve add on. Otherwise you should not cut those!)
I make a very small snip on the sides of the pocket to indicate where the fold line is.
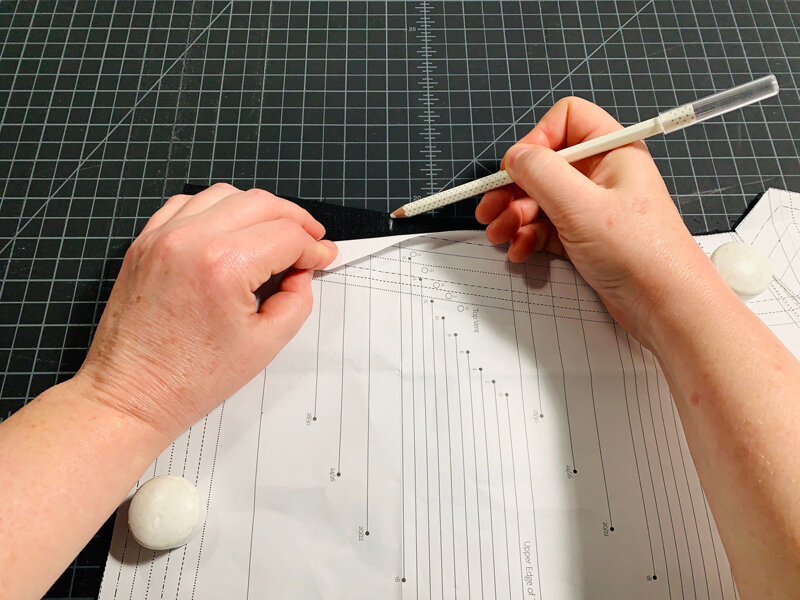
How to Transfer Markings
If you’ve never transferred markings, like bust darts or pocket placements, here’s an easy step by step guide on how to do it!

Insert a pin into the apex of your bust dart, through the pattern and both layers of the fabric.

2. Peel back the edge of the pattern and transfer the end of the dart legs to the fabric on both sides.

3. Peel back the pattern at the spot where you inserted the pin, and mark that spot with your marking tool.
4. Flip the whole piece over, and mark the opposite side of the bust dart.

5. If you also need to mark your pocket placements, do that now before continuing with your bust dart. Like before, insert a pin into the dot for the pocket that corresponds with your size and garment (note that there are lower pockets for the dress & tunic views).

6. Like with the bust darts, peel back the pattern to transfer the spot where the pin inserted to your fabric. Remember, the darts should be marked to the wrong side of the fabric, and the pockets should be marked on the right side of the fabric!
7. Remove the pattern completely from the fabric. Using your marking tool and ruler, connect the bust apex to the dart leg marks made at the side of the fabric. Repeat on the other side so you have both bust darts marked.
That’s it for today! Enjoy this process of ironing, cutting, notching, and marking the pattern pieces. It’s understandable to want to rush through this to get to the sewing, but all of this preparation sets you up for success! So take your time and do it right. See you next time!