
Lottie Sewalong: Side Seams & Vents
In today’s post for the Lottie Dress, Top, & Tunic Sewawlong we are focusing on the side seams and the vents. Note: if you want to 100% confirm the fit of the pattern, you can always baste the side seams first, try it on, and adjust accordingly. If you need to take it in a tiny bit or make it a little bit larger, it's still possible during this step by simply reducing or enlarging your seam allowance. Hopefully you made a muslin and nothing major needs to be adjusted! But small amounts are totally acceptable at this point. Okay, let's get started!
I almost never advise anyone to finish the edge of the fabric prior to sewing a seam, as it can stretch and warp the fabric, and you for sure don’t want to do that before construction. However, in the case of the Lottie side seams, because of the angle under the arm, I do suggest that you finish the fabric first. There is only one exception to this: if you have a serger, and you are not including the vents, and you feel really good about your ability to sew tight corners with it, you can for sure pin the side seams together, right sides facing, and simply serge the side seams together from sleeve hem to garment hem. However, for any other circumstance, I highly recommend that you finish the fabric first.

For any view, vents or not, use the stitch of your choosing and finish the edge of the side seams. For my example, I used my serger and carefully serged the edges of the front and back on each side seam. If you are using a serger, be careful not to cut off any fabric. If you do not have a serger, you can use a regular or 3-step zigzag on the edge also.

2. Pin the side seams together, right sides facing, from the hem of the sleeve (any length) to the hem of the garment (any length).

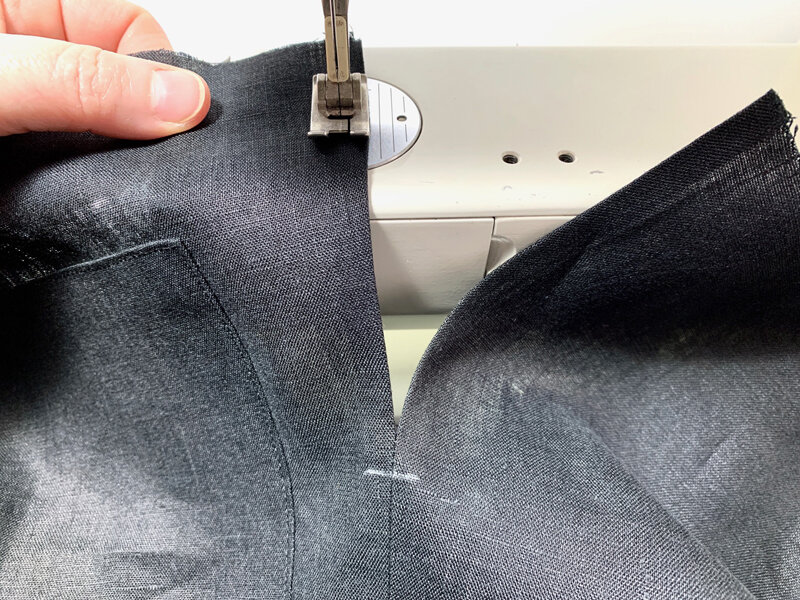
3. If you are including a vent in your garment, use a water soluble marking tool to mark where you will be stopping, based on the mark on the pattern for the length and size you are sewing. In my photo above, you can see the white dash above the second pin from the bottom. That’s my stopping point for the vent.
4. For all views, sew from the sleeve hem to either the hem of the garment, or to your vent stopping point.

5. For views without vents, simply press the seam allowance open. Press from the garment hem to the underarm curve, then from the sleeve hem to the underarm curve, leaving the underarm curve alone for now.

6. For views with a vent, press each side of the open area 5/8”, so the amount folded away from the vent matches the amount of the seam allowance above.

7. Fold and press the seam allowance around the vent in half, blending into the seam allowance above the vent. Using a water soluble marking tool, mark a line where you would like to pivot above the vent. For my example, I pivoted about 3/8” above the top of the vent.
8. As I talked about in a previous post, I prefer the look of my stitch from the needle and spool versus the bobbin, so for my vent topstitching, I transferred the pivot mark to the right side, and sewed my vent topstitching on the right side. You can also do it on the inside as well. Totally fine too! Either way, simply stitch up one side of the vent, making sure to stay on the fold you made in the previous step, pivot at the top, sew across the top of the vent, and then back down the other side of the vent.


9. Give the vent a good press with the iron, and repeat on the other side seam.
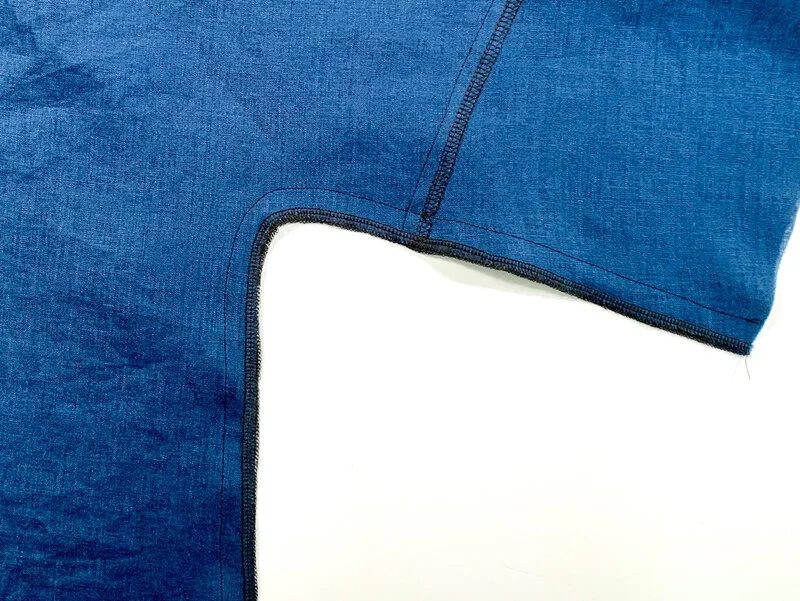
10. Lastly, on all views, you will notice that the underarm curve will not sit flat, if left as is. Pictured above is the side seam as seen in previous images: serged on each side, sewn at 5/8” seam allowance, and then pressed open.
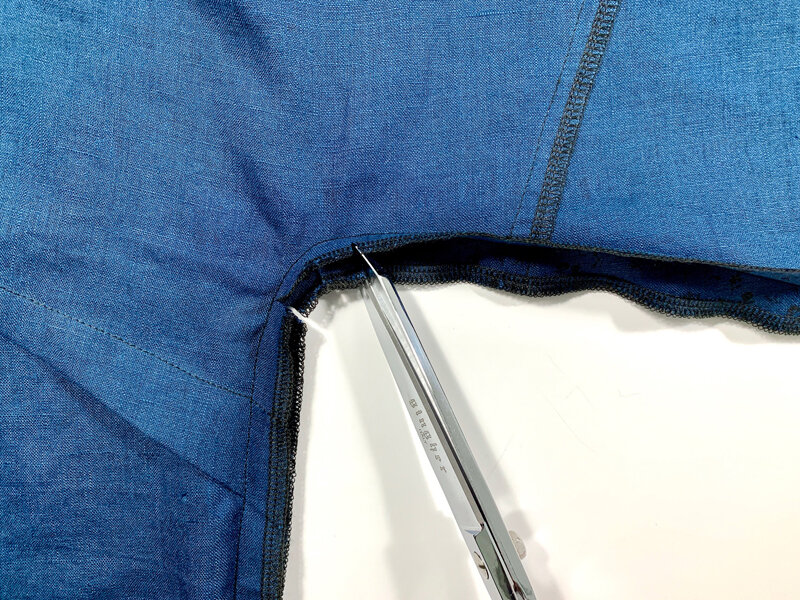
11. All we need to do is make three clips into the curve, to allow it to fully open. Carefully snip three cuts into the seam allowance, then turn right side out again and press.

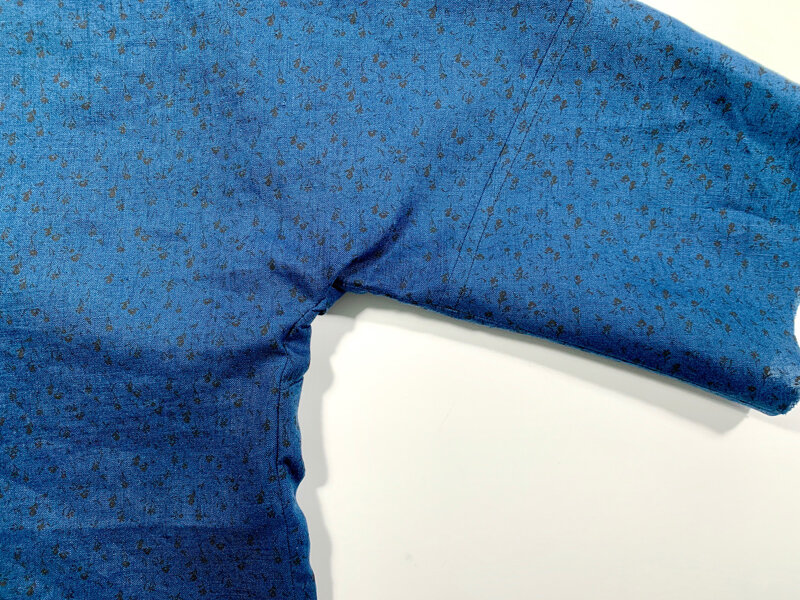
12. And now, after clipping the curve, it looks like the image above! Easy!
That is it for the side seams and vents! Remember, you can do any vent on any view you like. It’s your choice! See you here next time for the last few Lottie Sewalong posts!